-
Starting your plan
Starting your project plan requires only two steps: just go to the “Projects” view and click on “Create”.

Does your project already exist? Just activate it pressing “Activate” in your “Projects” view. Project activation allows you to switch between your available projects quickly and easily. Among them, you’ll find projects that you already created or projects for which you have been chosen as a participant.
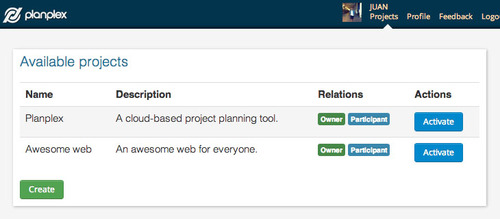
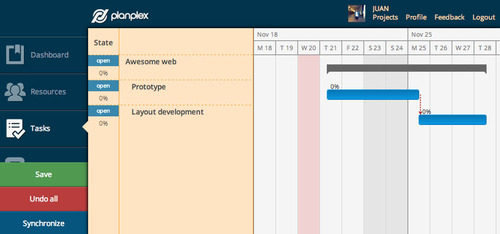
After project activation, all project plan views are enabled. Note that no changes you make are visible to the other participants until you hit the “Save” button at the bottom-left corner. This allows you to make changes and test different planning options before making them available to your coworkers.
-
Introducing Planplex
About one year ago, we decided to revolutionise our lives and hoped to improve others’ just one bit. The vehicle for such adventure was, as in many technology startups, something we wanted for us but felt others could profit from as well. In our minds and hearts was an affordable project planning tool, built for collaboration from the ground up.
During the past twelve months we’ve been working hard on a software stack that brings that vision to life, and we are glad to announce that an internal alpha version is already up and running; and that a private beta will be soon available to selected individuals.
We are proud and thrilled to invite everyone to follow our progress, and help us evolve and improve our product vision.
We will be leaving our code editors from time to time to post on this blog about product features, technological challenges and random thoughts, so don’t forget to follow us on twitter or subscribe to our RSS feed.
So, please come visit us at www.planplex.com